ADVERTISEMENT
1. Prepare the Chocolate Pancakes:
In a large bowl, whisk the eggs, sugar, and salt until the mixture is light and fluffy. This will help incorporate air, making the pancakes lighter.
Gradually add the milk, whisking continuously to ensure the mixture stays smooth.
Sift the flour and cocoa powder into the mixture to avoid lumps. Slowly fold them into the wet ingredients until the batter is smooth and well-combined.
Stir in the vegetable oil to prevent the pancakes from sticking to the pan during cooking.
Heat a non-stick frying pan or skillet over medium heat. Grease lightly with oil if needed.
Pour a small ladleful of the pancake batter into the pan and swirl it around to create a thin, even layer.
Cook the pancake for about 1-2 minutes on each side, or until the edges begin to lift and the center is fully set.
Repeat with the remaining batter, stacking the pancakes on a plate as you go. Let the pancakes cool slightly before assembling the dessert.
2. Prepare the Creamy White Layer:
In a small bowl, mix the instant gelatin with 60 ml of cold water and let it sit for about 5 minutes to bloom. This allows the gelatin to absorb the water and soften.
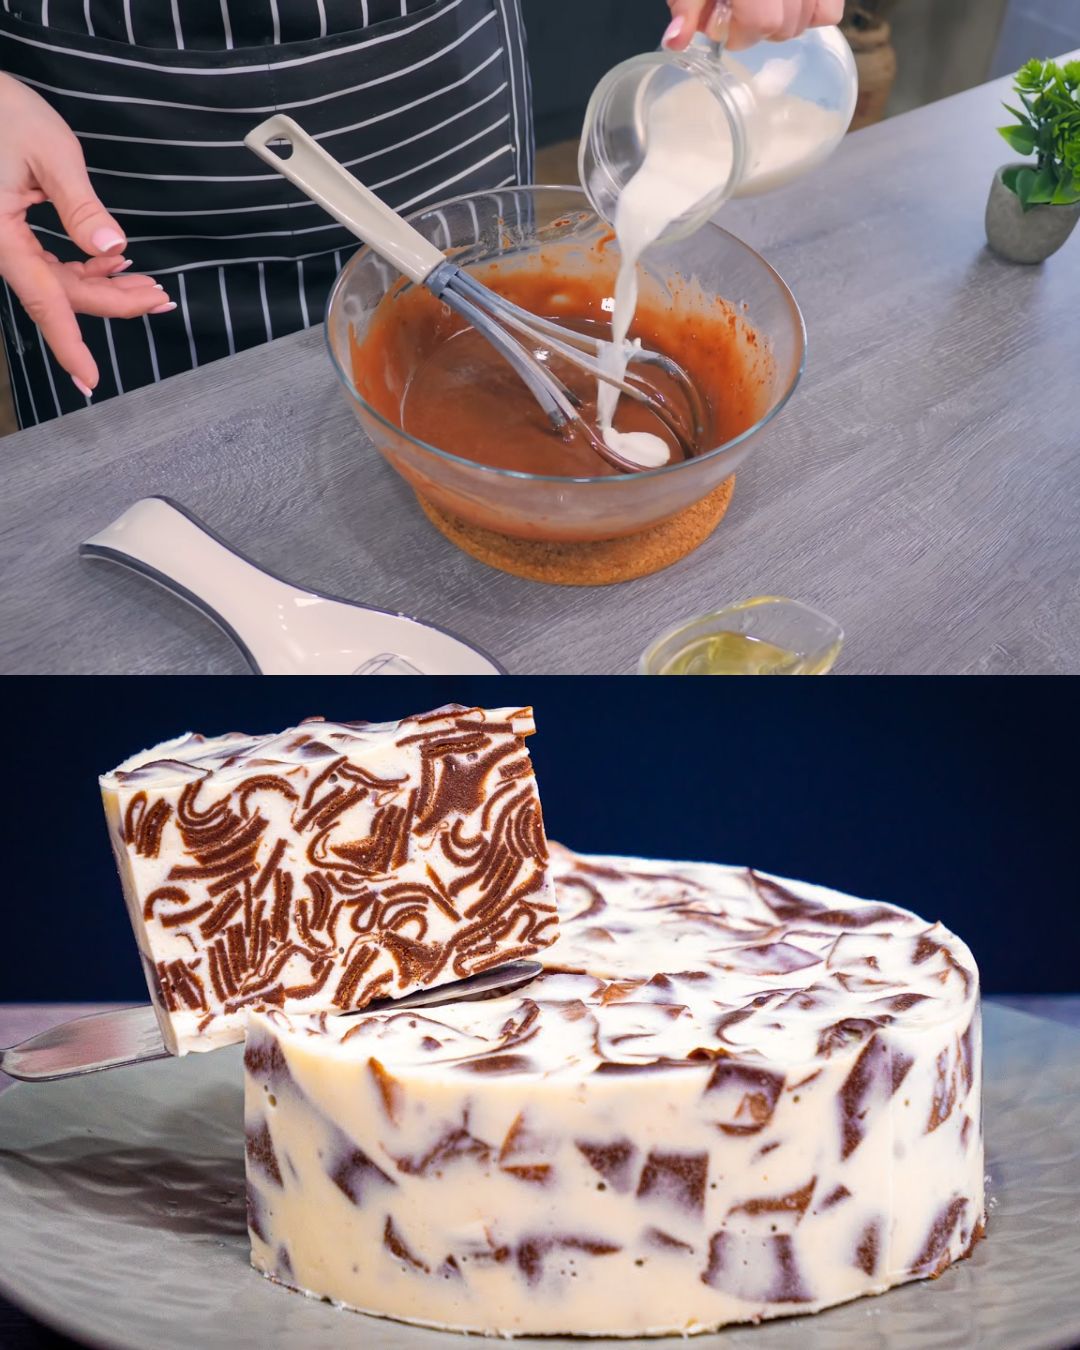
While the gelatin is blooming, combine the sour cream, sugar, and vanilla sugar in a large mixing bowl. Stir well until the sugar is fully dissolved and the mixture is smooth and creamy.
After the gelatin has bloomed, gently heat it over a water bath or in the microwave until it’s fully dissolved. Be careful not to overheat it.
Gradually whisk the dissolved gelatin into the sour cream mixture, ensuring it’s evenly distributed.
Set the mixture aside for a few minutes to thicken slightly before assembling the dessert.
3. Assemble the Chocolate Pancake Layered Cake:
On a serving plate, place one of the chocolate pancakes as the base.
Spread a generous layer of the creamy white mixture on top of the pancake, making sure it covers the entire surface.
Place another pancake on top of the cream layer and repeat the process until all the pancakes are used.
After the last pancake is placed, cover the entire cake with the remaining cream layer. Smooth it out with a spatula for a clean finish.
If you like, you can sprinkle some grated chocolate, cocoa powder, or fresh fruit on top for decoration.
4. Chill and Serve:
Place the assembled cake in the refrigerator and allow it to chill for at least 2-3 hours, or until the creamy layer is fully set.
Once set, slice the cake into wedges and serve cold.
Cooking Tips:
Sifting the Cocoa Powder: Cocoa powder tends to clump together, so make sure to sift it into the batter to prevent lumps.
Gelatin Activation: It’s important not to overheat the gelatin, as it can lose its setting ability if exposed to too much heat. Dissolve it gently in warm water or over a water bath.
Layering Tip: To get an even, clean look, use a spatula or the back of a spoon to smooth out the cream between each layer. This will ensure that the layers are neat and visually appealing.
Customization: You can flavor the cream layer by adding a splash of liqueur or coffee for an extra twist. Alternatively, you can add fresh berries or fruit between the layers for a burst of freshness.
Storage:
Refrigeration: Store the cake in the refrigerator, covered, for up to 3 days. Make sure the cream layer stays firm and the pancakes don’t dry out by keeping the cake wrapped or in an airtight container.
Freezing: You can freeze this pancake cake if needed. Place it in a freezer-safe container and wrap it tightly with plastic wrap to avoid freezer burn. Thaw it overnight in the refrigerator before serving.
Nutritional Facts (per serving, based on 8 servings):
Calories: 320 kcal
Protein: 7 g
Fat: 20 g
Carbohydrates: 28 g
Fiber: 2 g
Sodium: 150 mg
Please note that these values are approximate and depend on portion sizes and specific ingredients used.
FAQs:
1. Can I use a different type of cream for the white layer?
Yes, you can substitute sour cream with Greek yogurt or even whipped cream for a lighter version. Keep in mind that the texture and flavor will change slightly.
2. What if I don’t have instant gelatin?
You can use regular gelatin, but you’ll need to dissolve it in warm water and follow the packaging instructions for activation. Make sure to dissolve it thoroughly before adding it to the sour cream mixture.
3. How do I ensure the pancakes don’t stick to the pan?
Use a non-stick pan and lightly grease it with oil before each pancake. Also, make sure the pan is properly heated before pouring the batter.
4. Can I make this recipe ahead of time?
Yes! This pancake cake is actually best made in advance, as the cream needs time to set. You can make it a day ahead and refrigerate it overnight before serving.
5. What other toppings can I add?
You can top the cake with fresh berries, grated chocolate, or even a dusting of powdered sugar. If you want to add extra texture, consider adding chopped nuts like almonds or hazelnuts.
Conclusion:
This Chocolate Pancake Cake with Creamy White Layer is the perfect dessert for any occasion. It’s a stunning combination of rich chocolate pancakes and a light, creamy filling that balances the richness beautifully. The layers of pancake and cream set into a delightful cake-like structure that is as pleasing to the eye as it is to the palate.
Serve this cake for birthdays, family gatherings, or simply as a sweet treat after dinner. The recipe is versatile enough to customize with different flavors and toppings, making it a great addition to your dessert repertoire. Enjoy a slice of this indulgent creation and impress your friends and family with your culinary skills.
ADVERTISEMENT
