ADVERTISEMENT
Step 4. Lay Out The Foundation For The Concrete Block Bench

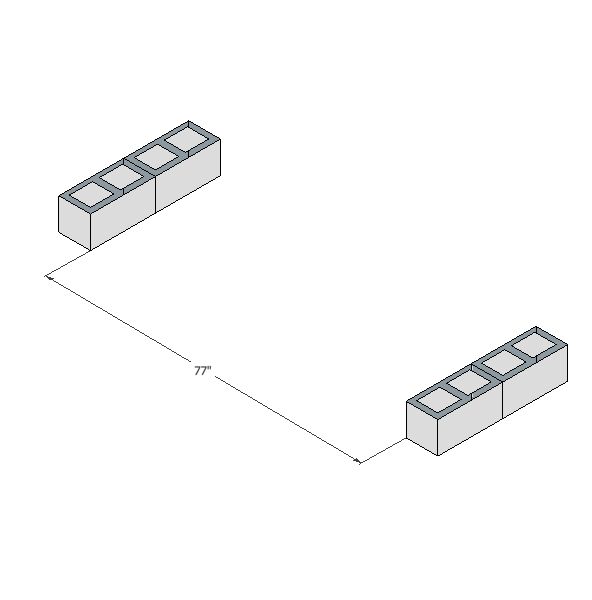
Lay the first 4 blocks at the distance you want the length of the bench seat, 2 stacked on each side. The holes will be open at the ground and facing you when looking down.
For the placement distance, I had my bench base just under 77” from the left base leg to the right (inside to inside).
This measurement left a 3” overhang of the posts on each side when it was done.
The 3” overhang was planned at that measurement because of how I wanted the planter box add-ons coming up in part two of this series.
As mentioned in the materials note, when looking top down at the holes, each cinder block has one side with narrower holes and wider edges around them (the nicer looking side).
And the other side has wider holes with narrower edges (a little scraggly-looking). Be sure to lay the blocks so that the wider side is facing up. This gives you more gluing surface.

Now take the construction adhesive and run a bead of glue around the edges.
Take care to place the glue a little closer to the inside because the glue may spill over the outside and be visible if you put the bead right in the middle.
Repeat on the other side.

Next, add two more blocks on top of the glued bottom blocks, on both the left and right side.
Again, be sure to place the wider side on top of the glue since it has more surface. The skinner side will be facing you.
ADVERTISEMENT